Discover how stock photos can transform your visual content strategy without breaking the bank. Learn about licensing options, top resources, and expert tips for selecting authentic images that enhance your brand while avoiding common pitfalls. Save time and money with professional visuals for any project.
Unlock your creative potential with this guide on importing fonts into Cricut Design Space. Learn to select perfect typefaces for stunning designs, understand font file types like TTF and OTF, and discover top sources for free and premium fonts. Follow step-by-step instructions for installing fonts on any device, effectively manage system fonts.
Looking for free photos to enhance your projects without breaking copyright laws? You’re in luck! The internet is teeming with high-quality, legally available images that you can download and use without spending a dime.
In today’s digital age, visual content plays a crucial role in capturing attention and conveying messages effectively. Whether you’re a blogger, marketer, or simply someone who loves to create, having access to a wide array of free, legal photos can be a game-changer. But how do you navigate the vast sea of online images while staying on the right side of copyright laws?
Understanding Legal Free Photo Downloads
What Are Stock Photos?
Stock photos are pre-shot images available for licensing and use in various projects. These photos cover a wide range of subjects and are created by professional photographers or artists. Stock photos provide a convenient and cost-effective solution for individuals and businesses needing high-quality visuals without the expense of custom photoshoots.
Types of Licenses for Free Photos
When downloading free photos legally, you encounter different license types:
Public Domain: Images with no copyright restrictions
CC BY-SA: Requires attribution and sharing under the same license
Royalty-Free: One-time payment for unlimited use
Often found on stock photo websites
May have some restrictions on commercial use
Free for Personal Use: Limited to non-commercial projects
Typically requires attribution
Commercial use may require purchasing a license
Free Stock Photo Websites: Offer images under various licenses
Unsplash: Free for commercial and non-commercial use
Pexels: Free for personal and commercial use
Pixabay: Most images free for commercial use without attribution
Understanding these license types ensures you use free photo downloads legally in your projects. Always check the specific terms of each license before using an image to avoid copyright infringement.
Finding Free Photo Sources
Search Engines and Image Databases
Utilize search engines like Google Images to find free photos. Apply filters such as “Usage rights” and select “Creative Commons licenses” to narrow your results. Image databases like Wikimedia Commons offer a vast collection of free-to-use images. These platforms provide advanced search options to refine your queries based on specific license types.
Free Stock Photo Websites
Popular free stock photo websites include Unsplash, Pexels, and Pixabay. These platforms offer high-quality, royalty-free images for personal and commercial use. Unsplash features a diverse range of professional photographs, while Pexels specializes in lifestyle and business imagery. Pixabay provides a mix of photos, vectors, and illustrations. Each site offers a free photo download option, allowing you to access thousands of images without cost.
Public Domain Resources
Explore public domain resources for copyright-free images. The New York Public Library Digital Collections and the Library of Congress offer extensive archives of historical photographs and artworks. NASA’s image gallery provides stunning space-related visuals available for public use. These sources often include vintage illustrations, maps, and scientific images that can add unique visual elements to your projects.
How to Download Free Photos Legally
Checking License Terms
Before downloading free photos, carefully review the license terms associated with each image. Look for specific usage rights, attribution requirements, and any restrictions on commercial use. Many free photo websites display license information directly beneath the images or provide a link to the full license terms. Familiarize yourself with common license types such as Creative Commons, Public Domain, and Royalty-Free to ensure compliance with copyright laws when using free photo downloads.
Understanding Usage Rights
Understand the usage rights granted by the license to avoid potential legal issues. Some licenses allow unrestricted use, while others may require attribution or limit commercial applications. Pay attention to:
Commercial vs. non-commercial use
Modification permissions
Attribution requirements
Redistribution restrictions
Ensure your intended use aligns with the specified usage rights to maintain legal compliance when using free photo downloads.
Verifying Image Quality
Assess the quality of free photos before downloading to ensure they meet your project requirements:
Check resolution: Download high-resolution images suitable for your intended use.
Examine clarity: Look for sharp, well-focused photos without visible pixelation.
Evaluate lighting: Choose images with proper exposure and balanced lighting.
Consider composition: Select photos with visually appealing arrangements and framing.
Inspect for watermarks: Avoid images with visible watermarks or logos.
Download several options to compare quality and select the best-suited image for your project. Remember that while free photo downloads offer cost-effective solutions, maintaining high standards for image quality enhances the overall impact of your visual content.
Using Free Photos Correctly
Properly using free photos involves understanding and adhering to license terms. Here’s how to ensure you’re using free images correctly:
Giving Proper Credit
When using free photos, always check the attribution requirements. Some licenses mandate crediting the photographer or source. Include the photographer’s name, the website, and any specific attribution text required by the license. Place this information near the image or in your project’s credits section. For example:
“Photo by John Doe on Unsplash”
Failing to provide proper credit can lead to copyright infringement, even if the image is free to use.
Commercial vs. Personal Use
Understand the distinction between commercial and personal use when downloading free photos:
Personal use: Using images for non-profit purposes, such as personal blogs or school projects
Commercial use: Utilizing images for business or profit-generating activities
Some free photo licenses restrict usage to personal projects only. Before using a free photo download for commercial purposes, verify that the license allows it. Many stock photo websites offer filters to search for commercially licensed images.
Modifying Free Images
Some free photo licenses allow modifications, while others prohibit alterations. When modifying free images:
Check the license terms for modification permissions
Respect the integrity of the original work
Consider mentioning any modifications in your attribution
If you need to extensively modify images, look for free Vector files, which are easier to edit. Some websites offer free Vector downloads alongside their photo collections.
Remember, even with modification rights, you must still adhere to other license terms, such as attribution requirements or usage restrictions.
Best Practices for Free Photo Downloads
Keeping Records of Sources
Document the source of each free photo download. Create a spreadsheet with columns for the image file name, website URL, photographer’s name, and license type. Include the date of download and any specific attribution requirements. This practice ensures you can easily reference the source and comply with license terms if questioned about image usage.
Avoiding Copyright Infringement
Verify the license terms before using any free photo download. Read the full license agreement, not just the summary. Understand the difference between commercial and non-commercial use. Some images labeled “free” may have restrictions on commercial applications. Respect any attribution requirements specified in the license. When in doubt, contact the photographer or website administrator for clarification.
Using Reverse Image Search
Employ reverse image search tools to verify the authenticity of free photo downloads. Upload the image to Google Images or TinEye to check if it appears on other websites. This process helps identify potential copyright issues or misattributed images. If you find conflicting information about the image’s origin or licensing, avoid using it to prevent legal complications.
Troubleshooting Common Issues
Dealing with Watermarked Images
When encountering watermarked images during your free photo download search, verify the image’s license terms. Some free stock photo sites use watermarks to protect their content. If you find a watermarked image:
Check if a non-watermarked version is available for download
Look for alternative sources offering similar images without watermarks
Consider using advanced search filters to exclude watermarked results
Explore Free Vector options as they often come without watermarks
If you need high-quality, watermark-free images for commercial use, consider using a Shutterstock Coupon to access premium content at a reduced cost.
Handling Copyright Infringement Notices
If you receive a copyright infringement notice for an image you believed to be free:
Remove the image immediately from your website or project
Review your records of the image source and license terms
Contact the copyright holder to explain the situation and seek resolution
Verify the authenticity of the notice to ensure it’s not a scam
Consult legal advice if needed, especially for commercial projects
Double-check license terms before using any free photo download
Keep detailed records of image sources and licenses
Use reputable free stock photo sites with clear licensing information
Implement a system to regularly review and update image usage on your projects
Conclusion
Downloading free photos legally opens up a world of creative possibilities for your projects. By following the guidelines outlined in this article you’ll be able to find high-quality images while respecting copyright laws. Remember to always check license terms verify image quality and give proper credit when required. With the wealth of resources available from stock photo sites to public domain collections you’re now equipped to enhance your visual content legally and ethically. So go ahead and start exploring the vast world of free photos to bring your ideas to life!
Are you looking to monetize your photography skills or find high-quality images for your projects? Stock photo platforms offer a fantastic opportunity to do both. These online marketplaces connect photographers with businesses, designers, and individuals seeking diverse visual content.
We’ll guide you through the essential steps to create an account on popular stock photo platforms. Whether you’re a budding photographer hoping to sell your work or a content creator in need of stunning visuals, understanding this process is crucial. By following our tips, you’ll be well on your way to navigating these platforms with ease and confidence.
Key Takeaways
Choose the right platform by evaluating image quality, library size, and pricing structure
Gather necessary information like email, password, and personal details before signing up
Complete the account creation process by verifying your email and setting up your profile
Understand platform guidelines, including content requirements and licensing options
Prepare high-quality images and add relevant metadata before uploading
Improve your success by staying current with trends and diversifying your portfolio
Choosing the Right Stock Photo Platform
Popular Stock Photo Websites
Shutterstock: Offers a vast library of high-quality images across diverse categories
iStock: Known for its curated collection and exclusive content
Adobe Stock: Integrates seamlessly with Creative Cloud applications
Getty Images: Provides premium, editorial, and commercial images
Depositphotos: Features a user-friendly interface and competitive pricing
Dreamstime: Offers both free and premium content options
Image quality: Evaluate the overall standard of photos available
Library size: Check the number and variety of images offered
Licensing options: Understand the different usage rights and restrictions
Pricing structure: Compare subscription plans and pay-per-image options
Search functionality: Test the ease of finding specific images
Contributor terms: Review revenue share and payout options for photographers
Customer support: Assess the availability and responsiveness of support services
User interface: Consider the platform’s ease of use and navigation
Mobile compatibility: Determine if the platform offers a mobile app or responsive design
Integration capabilities: Check for compatibility with design software and content management systems
Steps to Create an Account
Creating an account on stock photo platforms like Shutterstock and iStock involves a straightforward process. Follow these steps to get started:
Gathering Necessary Information
Collect essential details before signing up:
Valid email address
Strong password (8-12 characters with a mix of letters, numbers, and symbols)
Full name
Country of residence
Phone number (for verification purposes)
Payment information (for contributors)
Signing Up for an Account
Navigate to the platform’s registration page and complete these steps:
Click on the “Sign Up” or “Create Account” button
Enter your email address
Choose a unique username (if required)
Create a strong password
Fill in personal details (name, country, etc.)
Accept the terms of service and privacy policy
Complete any additional requirements (e.g., captcha verification)
Check your email inbox for a verification message
Open the email from the stock photo platform (e.g., Shutterstock or iStock)
Click on the verification link provided
Log in to your newly created account
Complete your profile by adding a profile picture and bio (optional)
Setting Up Your Profile
Adding Personal Information
Complete your profile with accurate personal details. Add your full name, location, and contact information. Include a brief bio highlighting your photography expertise and style. For platforms like Shutterstock and iStock, provide a professional headshot to establish credibility with potential buyers.
Creating a Portfolio
Curate a diverse portfolio showcasing your best work. Select 10-15 high-quality images that represent your range and skills. Organize your portfolio into categories such as landscapes, portraits, or wildlife. Add relevant keywords and descriptions to each image for better searchability on Shutterstock and iStock platforms.
Setting Payment Preferences
Configure your payment settings to ensure timely compensation. Choose your preferred payment method, such as PayPal or direct bank transfer. Set your minimum payout threshold and specify your tax information. For iStock and Shutterstock, review their specific contributor payment policies and adjust your settings accordingly.
Understanding Platform Guidelines
Content Requirements
Stock photo platforms maintain strict quality standards for submitted content. Shutterstock and iStock require high-resolution images with a minimum of 4 megapixels. Images must be sharp, well-exposed, and free from noise or artifacts. Both platforms prefer authentic, non-manipulated photos that accurately represent real-life scenarios. Avoid submitting images with visible logos, trademarks, or copyrighted material. Ensure all content adheres to the platform’s technical specifications, including file format, color space, and metadata requirements.
Licensing and Rights
Stock photo platforms offer various licensing options to protect both contributors and buyers. Shutterstock and iStock typically provide royalty-free licenses, allowing buyers to use images multiple times for a one-time fee. Contributors retain copyright ownership of their work but grant the platform non-exclusive rights to sell and distribute the content. Understand the difference between commercial and editorial licenses, as each has specific usage restrictions. Be aware of model and property releases required for images featuring recognizable people or private property. Familiarize yourself with each platform’s specific licensing terms to ensure compliance and maximize your earning potential.
Uploading Your First Photos
After setting up your account, the next crucial step is uploading your first photos to the stock photo platform. We’ll guide you through the process to ensure your images are ready for submission and have the best chance of being accepted.
Preparing Your Images
Before uploading to platforms like Shutterstock or iStock, prepare your images to meet their quality standards. Edit your photos for optimal clarity, color balance, and composition. Ensure your images are:
High-resolution (typically a minimum of 4 megapixels)
Free from noise, artifacts, and excessive post-processing
Properly exposed and in focus
Saved in an accepted file format (usually JPEG)
Free from watermarks, borders, or text overlays
Adding Metadata and Keywords
Proper metadata and keywords are essential for your photos to be discoverable on stock platforms. Add relevant information to each image:
Title: Create a concise, descriptive title
Description: Write a clear, detailed description of the image
Keywords: Add 25-50 relevant keywords that accurately describe the image content, style, and potential uses
Categories: Select appropriate categories for your image
Model or property releases: Upload necessary releases if your image contains recognizable people or private property
Submitting for Review
Once your images are prepared and tagged, it’s time to submit them for review. Follow these steps to complete the submission process:
Navigate to the upload section on Shutterstock or iStock
Select the files you want to upload
Review the metadata and make any final adjustments
Accept the platform’s terms and conditions
Submit your images for review
After submission, the platform’s review team will assess your images for technical quality, commercial viability, and compliance with guidelines. This process typically takes 1-7 days, depending on the platform. Once approved, your images will be available for purchase by customers worldwide.
Tips for Success on Stock Photo Platforms
Improving Photo Quality
Enhance your images’ technical and aesthetic aspects to stand out on platforms like Shutterstock and iStock. Use high-quality equipment and post-processing techniques to achieve sharp, well-exposed photos. Focus on proper lighting, composition, and color balance to create visually appealing images that meet platform standards.
Staying Current with Trends
Monitor popular themes and styles on Shutterstock and iStock to align your content with market demands. Analyze top-selling images and incorporate current design trends into your work. Create content that addresses seasonal topics, emerging technologies, and cultural shifts to increase your photos’ relevance and marketability.
Diversifying Your Portfolio
Expand your portfolio’s range on platforms like Shutterstock and iStock to appeal to a broader audience. Include a variety of subjects, styles, and concepts in your collection. Experiment with different photography genres such as landscapes, portraits, still life, and abstract imagery to cater to diverse client needs and increase your chances of sales across multiple categories.
Troubleshooting Common Issues
Account Verification Problems
Account verification issues on stock photo platforms like Shutterstock and iStock can delay your ability to start uploading and selling images. To resolve these problems:
Double-check your personal information for accuracy
Ensure your government-issued ID matches the details on your account
Contact customer support if verification takes longer than 72 hours
Use a clear, well-lit photo of your ID when submitting documentation
Verify your email address by clicking the confirmation link sent to you
Review the platform’s specific guidelines for image quality and content
Check for technical issues such as noise, blur, or poor exposure
Remove any visible logos, trademarks, or copyrighted elements
Ensure model and property releases are properly submitted when required
Improve your metadata by using relevant keywords and descriptions
Resubmit rejected images after making necessary adjustments
Learn from feedback provided by reviewers to avoid future rejections
Conclusion
Creating an account on stock photo platforms opens up exciting opportunities for photographers and content creators. By following the steps we’ve outlined and implementing our tips for success you’ll be well-equipped to navigate these platforms effectively. Remember to focus on producing high-quality images adapting to market trends and diversifying your portfolio. If you encounter any issues don’t hesitate to reach out to platform support or consult community forums. With persistence and dedication you’ll be on your way to building a successful presence in the world of stock photography.
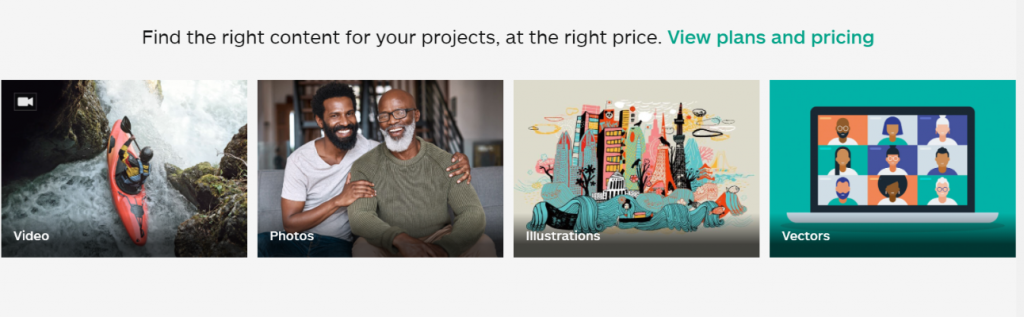
iStock is one of the few stock media agencies that does not only sell stock photos but also stock video footage. Founded in 2000, the company has grown into over 7 million of digital files. It has been selling amazing video footage for a decade. Many creative professionals use the stock site because of its easy-to-use interface and very reasonable pricing & plans. It also boasts one of the most user-friendly search features in the market.
iStock has its own search technology called faceted search. You can search the library through categories and keywords. In your keyword search, you can use the standard Boolean, such as:
And
Or
Not
You can also filter your searches by:
Searching within a search allows you to narrow down the results by doing a second search from your initial search pages.
Elemental search lets you search for image qualities. You can specify prominent colors in the video to narrow your choices to stock video footage that match your theme.
Video file formats allow you to search for videos by PAL, DV or NTSC. You can also search by dimension at 16:9 and 4:3. Moreover, you can search to find 720 or 1080 HD and download whichever file format you need.
Search by people. Are you looking for stock video footage with people? You can narrow down your choices to videos that feature people. You can specify the gender and age group, too. You can also choose among videos that do not include people in them.
Search by age. If you are looking for the most recent uploads, you can limit your files to searches that have been uploaded in the last hour, the last 24 hours, within the week or the past month.
What if you want only free content?
You can register to iStock (using a promo code that can be found here) to avail of their free stock video footage every week. That is 4 free stuff in a month. Once you sign up, you will also have access to the stock site’s media library. If you wish to purchase from the library, simply subscribe to a plan or purchase credits. One video from the Essentials collection, which is the best value of tight budgets, costs 6 credits. On the other hand, the Signature collection, which includes the very best videos, have video footage that starts at 18 credits.
iStock lets you save with their flexible plans. You don’t have to resort to free videos in the Internet. The stock media agency protects your business investment for a price that fits your budget. Of course, there will be restriction on the use of the video. As long as you adhere to the terms and conditions, you don’t have to worry about any legal issues that may arise in the future.
Although there are some changed with the iStock pricing, the stock photo agency still allows you to purchase royalty-free images and illustrations in two ways: subscription plans and credits. You can either pay per download with credits or subscribe and save with a plan. The new pricing still allow you to download images, vectors and video clips with iStock credits, but there are some significant changes. Let us consider some of them.
When you buy more, you save more. This is an old feature, but one that does not need to be changed. Many photo buyers are happy about this feature. That’s why the stock photo website decide to retain it.
The credits never expire. This is another feature that we all love about the iStock credits. They do not expire, which means you can download images whenever you need. You do not have to worry about expiration dates.
The base package contain 1 credit. With one credit, you can purchase one Essential image. On the other hand, a Signature image takes 3 credits. So if you purchase 18 credits, you have the option to purchase 18 Essential images, 6 Signature images or anything in between.
The discount starts steep but buying more offers a better deal. You can purchase credits by 1, 3, 6, 18, 36, 60, 150, and 300. If you need a larger package, you can contact the stock site. The discounts start at 10% but increases as the size of the package also increase.
It is more affordable than Shutterstock. The minimum credit package is more affordable at iStock. Shutterstock offers the smallest package with 2 images at $29, you can get a 1 credit package for only $15.
Credit balances are changing. If you have remaining credits on your account, they will be adjusted at a 5:1 conversion rate, rounding up in your favor. For instance you have 18 credits left on your account. It will be divided into 5, so 18 divided by 5 equals 3. The remainder 3 credits will be round up. Ultimately, you will get 4.
Pricing will no longer be based on size. Contrary to now, there will be no size-based pricing. You can choose any size that fits your creative project for the same prize. You can also upgrade your downloads from small to large after the change.
The changes on iStock credits are now on effect. It gives you a better value, even for a higher price. You will be able to download any image size at the same price. The only difference in prices will happen in the kind of collection. Whatever you choose, always go back to the ultimate rule in buying stock images: Choose and purchase a package that fits your creative needs and budget.